> ## Documentation Index
> Fetch the complete documentation index at: https://docs.aliengh.com/llms.txt
> Use this file to discover all available pages before exploring further.
# The building suite
> BIM-style modelling in Grasshopper: levels, grids, walls, openings, floors, roofs, stairs and structure, wired by name.
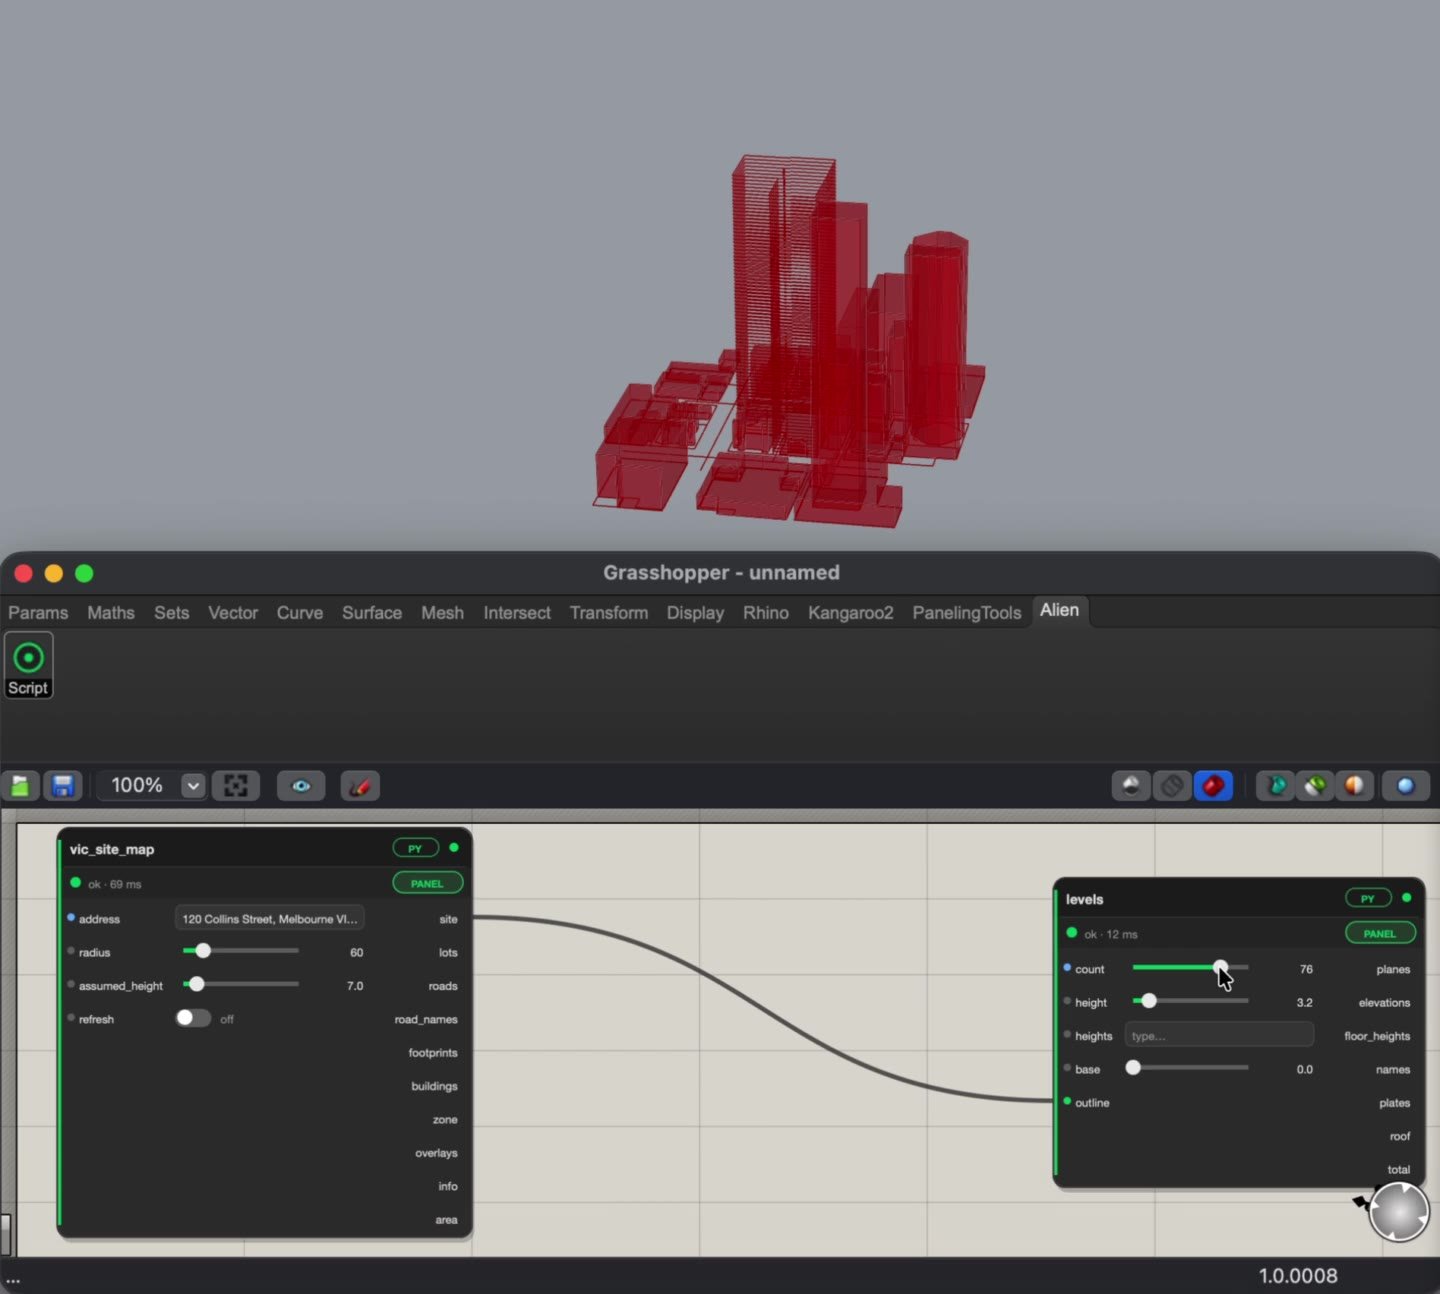
The building suite models a building the way BIM tools do, inside Grasshopper. Set the site once, add levels and grids, and every wall, slab, stair and beam afterwards knows where it sits. Change a storey height and everything above it follows.
 ## How the pieces connect
Components pass elements to each other as **records**: one line of JSON text per level, grid, wall, slab or member. Any component, a Grasshopper panel or an agent can read them. Wire them by pin name:
```mermaid theme={null}
flowchart LR
site[Site base] --> levels[Levels]
site --> grids[Grids]
levels --> walls[Walls]
wt[Wall types] --> walls
walls --> doors[Doors] --> windows[Windows]
levels --> cw[Curtain wall]
levels --> slabs[Slabs]
st[Slab types] --> slabs
levels --> roofs[Roofs]
rt[Roof types] --> roofs
levels --> stairs[Stairs]
srt[Stair types] --> stairs
stairs -- voids --> slabs
stairs -- edges --> bal[Balustrades]
bt[Balustrade types] --> bal
grids --> bc[Beams and columns]
levels --> bc
bc --> se[Structure edit] --> cn[Connectors]
```
Select **Levels** and **Grids** and describe "a floor slab at every level inside the grid". The new component is built beside them, already wired, and reads their records for you.
## Types and elements
Most elements come in two parts. A **type** component says how it's built: the layers of a wall, slab or roof, the construction of a stair, the style of a balustrade. The element component places it. In the next beta, every type component has a **Save** button that adds the type to the panel's **Objects** library, with a thumbnail, so you can reuse it on the next project.
## The suite
Named levels with RLs, and Revit-style grids with bubbles and dimensions.
Layered walls from Australian build-ups, hosted doors and windows, curtain walls.
Slabs with openings, hip and gable roofs, stairs between levels, balustrades. Next beta.
Frames from real Australian sections, edited by pattern, with connections and a schedule.
This is a first pass at BIM-style modelling. The NCC checks are first-pass design checks, not certification. Some things aren't handled yet: openings don't see walls that butt into their host, pocket doors don't cut a pocket, stairs have no winders, roofs over courtyards and roof-to-roof joins aren't handled, and there are no schedules beyond the connector schedule.
This documentation is built and hosted on [Mintlify](https://mintlify.com), a developer documentation platform.
## How the pieces connect
Components pass elements to each other as **records**: one line of JSON text per level, grid, wall, slab or member. Any component, a Grasshopper panel or an agent can read them. Wire them by pin name:
```mermaid theme={null}
flowchart LR
site[Site base] --> levels[Levels]
site --> grids[Grids]
levels --> walls[Walls]
wt[Wall types] --> walls
walls --> doors[Doors] --> windows[Windows]
levels --> cw[Curtain wall]
levels --> slabs[Slabs]
st[Slab types] --> slabs
levels --> roofs[Roofs]
rt[Roof types] --> roofs
levels --> stairs[Stairs]
srt[Stair types] --> stairs
stairs -- voids --> slabs
stairs -- edges --> bal[Balustrades]
bt[Balustrade types] --> bal
grids --> bc[Beams and columns]
levels --> bc
bc --> se[Structure edit] --> cn[Connectors]
```
Select **Levels** and **Grids** and describe "a floor slab at every level inside the grid". The new component is built beside them, already wired, and reads their records for you.
## Types and elements
Most elements come in two parts. A **type** component says how it's built: the layers of a wall, slab or roof, the construction of a stair, the style of a balustrade. The element component places it. In the next beta, every type component has a **Save** button that adds the type to the panel's **Objects** library, with a thumbnail, so you can reuse it on the next project.
## The suite
Named levels with RLs, and Revit-style grids with bubbles and dimensions.
Layered walls from Australian build-ups, hosted doors and windows, curtain walls.
Slabs with openings, hip and gable roofs, stairs between levels, balustrades. Next beta.
Frames from real Australian sections, edited by pattern, with connections and a schedule.
This is a first pass at BIM-style modelling. The NCC checks are first-pass design checks, not certification. Some things aren't handled yet: openings don't see walls that butt into their host, pocket doors don't cut a pocket, stairs have no winders, roofs over courtyards and roof-to-roof joins aren't handled, and there are no schedules beyond the connector schedule.
This documentation is built and hosted on [Mintlify](https://mintlify.com), a developer documentation platform.